Showing posts with label psp tutorial. Show all posts

Tuesday, May 24, 2011

Bloom


Any resemblance to any other tutorial or signature is merely coincidental and is not intended

I am using the gorjuss artwork of Suzanne Woolcott.  You can purchase her art and a license to use it HERE from her store
I am using WeeScotsLass's mask 226 which you can download HERE from her blog
I am using the font Scriptina Pro
I am using a PTU kit from Karin Kreates Scrapz called "Bloom", which you can purchase HERE at I Got Lucky Skraps.  You can find her blog HERE

Pieces from the kit used in this tutorial are
Paper07
Paper05
FlowerBow04
Frame06
Flower03

You must have a working knowledge of PSP to complete this tutorial.  This tutorial was written using PSPXI

Open a new 600x600 image in psp
Open Frame06 and resize to your liking.
Open Paper05 and resize to 600x600. Place behind Frame06 Layer.
Using your magic wand select the inside of Frame06.  Go to Selections/Modify/Expand/Expand10.  Selections/Invert.  Select Paper05 Layer and press delete.  Selections/Invert.  Add a new Raser Layer.  Flood fill the inside of the selected area white. Selections/Select None  Place your new Layer (now referred to as white circle Layer) behind Paper05 Layer.
Open your tube.  Duplicate your tube Layer.  Make your original tube Layer invisible.
Working with your duplicate tube Layer go to Image/Resize/110%. Repeat the resizing step till you are satisfied with how large it is.  Go to Effects/Photo Effects/Black and White Film.  Place the duplicate tube Layer behind Paper05 Layer.  Add a drop shadow of 2 to duplicate tube Layer
Select Paper05 Layer. Go to Layers/Properties/Opacity/30
Select Frame06Layer.  Add a drop shadow of 2 to this Layer
Merge together Frame06, Paper05, duplicate tube, and white circle Layers.
Open Paper07 and resize to 600x600.  Add your Mask to Paper07 Layer.  Merge together mask group
Open FlowerBow04 and resize to your liking.  Go to Image/Mirror.  Image/Free Rotate/Right30%.  Add a drop shadow of 2 to this Layer
Open Flower03 and resize to your liking.  Add a drop shadow of 3 to Flower03 Layer.
Make your original tube Layer visible.  Resize if needed.  Add a drop shadow of 3 to your original tube Layer.
Resize the signature if needed
Add your text to the signature
Add your copyright information before saving.

Monday, May 23, 2011

A Pirate's Life


Any resemblance to any other signature or tutorial is merely coincidental and is not intended

I am using the beautiful artwork of  Keith Garvey.  This tube was purchased while he was with MPT, you can now purchase his art and a license to use it HERE at PTE
I am using Vix Mask 404, which you can download HERE from her blog
I am using the font Rapscallion
I am using a PTU kit from Rebellious Scraps called "A Pirate's Life" which can be purchased HERE at Scraps with Attitude

Pieces from the kit used in this tutorial are
anchor
barrel2
boat
chest 2
paper 9

You must have working knowledge of PSP to complete this tutorial.  This tutorial was written using PSPXI


Open a new 600x600 image in PSP and flood fill white
Open paper 9, resize to 480x480.  Place so paper9 is slightly off center.
Apply your mask to paper9 Layer.  Merge your mask group together and move the mask group to be slightly off center.
Open chest 2.  Resize to your liking.  Go to Image/Mirror.  Add a drop shadow of 3 to chest 2 Layer.
Open anchor.  Resize to your liking.  Add a drop shadow of 3 to anchor Layer
Open barrel 2.  Resize to your liking.  Add a drop shadow of 3 to barrel 2 Layer.
Open boat.  Resize to your liking.  Add a drop shadow of 3 to boat Layer.
Open your tube.  Resize if needed.  Add a drop shadow of 3 to your tube.
Resize the signature if needed. 
Add your text and place a drop shadow of 2 on your text Layer.
Add your copyright information before saving.

Sunday, May 15, 2011

Disco Chic


Any resemblance to any other tutorial or signature is merely coincidental and is not intended

I am using the beautiful artwork of Elia Chatzoudis.  This tube was purchased while he was with MPT, you can now purchase his artwork and a license to use it HERE at PTE
The font I am using is Amagro
I am using a PTU collab kit from Taggers Dreamz called "Disco Chic" that includes the mask used in this tutorial.  You can purchase the kit HERE at Taggers Dreamz

Pieces of the kit used in this tutorial are
80 elements
23 elements
13elements
12 elements
6 elements
106 elements
127papers
113 papers

You must have working knowledge of PSP to complete this tutorial.  This tutorial was written using PSPXI

Install the mask included in the collab kit.

Open a new 600x600 image in PSP.  Flood fill white.

Open paper127 and resize to 600x600.  Apply your mask.  Merge together the mask layer.
Open element 23 and resize to your liking.  Add a drop shadow of 1 to element23 Layer
Open element80 and resize to your liking.  Add a drop shadow of 3 to element80 Layer.
Open element6 and resize to your liking.  Go to Image/FreeRotate/Rotate 25 degrees Right.  Add a drop shadow of 3 to element6 Layer.
Open element13 and resize to your your liking. 
Open paper113 and resize to your liking.  Move paper113 Layer to behind element13 Layer.  Select element13 Layer.  Using your magic wand select the inside of the star of element13.  Go to Selections/Modify/Expand/Expand 9.  Selections/Invert.  Select paper113 Layer.  Press Delete.  Selections/Select None. 
Add a drop shadow of 3 to element13 Layer.  Merge together element13 Layer and paper113 Layer.
Open element12 and resize to your liking.  Go to Image/Free Rotate/Rotate 25 degrees Right.  Add a drop shadow of 1 to element12 Layer.
Open element106 and resize to your liking.  Add a drop shadow of 3 to element106 Layer.
Open your tube and resize if needed.
Resize the signature if needed.
Add your text.
Add your copyright information before saving.

Saturday, May 14, 2011

Pink


Any resemblance to any other signature or tutorial is merely  coincidental and is not intended

I am using the beautiful artwork of Jasmine Becket-Griffith.  This tube was purchased while she was with CILM.  You can now purchase her artwork and a license to use it HERE at CDO.
I am using Vix Masks 309 and 349.  You can download both of these masks HERE at her blog
I am using the font "Just Me Again Down Here"
I am using a huge PTU collab from the designers at I Got Lucky Skraps called "Birthday Wishes"  you can purchase this kit HERE at I Got Lucky Skraps.

Pieces of the kit used in this tutorial are
dbk-igls-birthdaycollab-paper10
IGLS_BDayCollabKLH_Tag06
olls_birthdaywishes_flower1
olls_birthdaywishes_pap9
SD~Happy2BD-Element021

You must have working knowledge of PSP to complete this tutorial.  This tutorial was written using PSPXI

Open a new 600x600 image in PSP.  Flood fill white
Open paper10 and resize to 600x600.  Apply mask 309.  Merge Mask Group together.
Open paper9 and resize to 600x600.  Apply mask 349.  Merge Mask Group together.
Open Tag06 and resize to your liking.  Add a drop shadow of 3 to your mask Layer
Open flower1 and Element021 and resize to your liking.  Add a drop shadow of 3 to both Layers
Open your tube and resize if needed.  Add a drop shadow of 3 to your tube.
Resize the tag if needed.
Add your text.
Add your copyright information before saving.

You can change the elements used around to make different tags for different needs

Saturday, May 7, 2011

Julia


Any resemblance to any other tutorial or signature is merely coincidental and is not intended.

I am using my artwork (FallnAngel) you can purchase this tube and a license to use it HERE from MPT.
I am using the font Adine Kirnberg Script
I am using Vix Mask 318.  You can download the mask from her blog HERE
I am using a PTU kit called "Julia" by FallnDesignz that was designed for this tube.  You can purchase this kit HERE at Taggers Dreamz

Pieces of the kit used in this tutorial are
paper4
paper5
element26
element23
element11
element8
element31

You must have working knowledge of PSP to complete this tutorial.  This tutorial was written using PSPXI

Open a new 600x600 image in PSP.  Flood fill white
Open paper5.  Go to Layers/LoadSave Mask/Load your mask.  Merge Mask group together.
Open paper4
Open element26.  Resize to your liking.  Using your magic wand select the inside of the frame.  Go to Selections/Modify/Expand2.  Selections/Invert.  Select paper4 Layer.  Press Delete.  Add a drop shadow of 3 to element26 Layer
Open element23 and resize to your liking.  Rotate 30 degrees left.  Add a drop shadow of 3 to element23 Layer.
Open element8 and resize to your liking.  Place behind element26 Layer.  Add a drop shadow of 2 to element8 Layer
Open element11 and resize to your liking.  Add a drop shadow of 3 to element11 Layer.
Open element31 and resize to your liking.  Add a drop shadow of 3 to element31 Layer
Open your tube and resize if needed.  Add a drop shadow of 3 to your tube Layer
Resize the signature if needed
Add your text
Add your copyright information before saving.

Thursday, May 5, 2011

Voodoo Cute

Any resemblance to any other tutorial or signature is merely coincidental and is not intended

I am using the beautiful artwork of Cudly Riggor Mortis.  This tube was purchased while she was with CILM, you can now purchase her artwork HERE at CDO
I am using the font Billy Argel
I am using a PTU kit from Pink Candy Designs called Voodoo, you can purchase this kit HERE at Lollipops 'N Gumdrops

Pieces of the kit used in this tutorial are
bunny
tag2
string
splatter
skullfly
skull
zipped heart

You must have working knowledge of PSP to complete this tutorial.  This tutorial was written using PSPXI

Open a new 600x600 image and flood fill white
Open tag2 and resize to  your liking. 
Open skull and resize to fit "inside" tag2.  Place a drop shadow of 3 on skull Layer.  Place on left side of tag2.
Open zipped heart and resize to fit "inside" tag2.  Go to Image/Free Rotate.  Rotate 10 degrees right.  Add a drop shadow of 3 on zipped heart Layer
Add the text "Cute" in a new Layer to fit between your skull and zipped heart.  Add a drop shadow of 3 to your text Layer. 
Merge together tag2, skull, zipped heart, and text Layers. 
Go to Image/Free Rotate.  Rotate 15 degrees Left.
Add a drop shadow of 3 to your merged Layer.
Open splatter.  Resize to your liking.  Place behind merged Layer.  Duplicate splatter Layer.  Arange the 2 splatter Layers to your liking.
Open string.  Resize to your liking.  Add a drop shadow of 3 to string Layer
Open skullfly.  Resize to your liking. Add a drop shadow of 3 to skullfly Layer.  Image/Free Rotate/15 degrees Left.  Duplicate.  With Duplicate Layer selected.  Image/Mirror.
Open bunny.  Resize to your liking.  Add a drop shadow of 3 to bunny Layer
Open your tube.  Resize if needed.
Resize your signature if needed
Add your text
Add your copyright information before saving.

Tuesday, May 3, 2011

Pink N Black

Any resemblance to any other signature or tutorial is merely coincidental and is not intended

I am using my artwork (FallnAngel) you can purchase my tubes and a license to use them HERE at MPT
The font I am using is Honey Script
I am using a PTU kit that I created (FallnDesignz) specifically for this tube called "A Mother's Love"  you can purchase this kit HERE at Taggers Dreamz

Pieces from the kit used in this tutorial are
frame2
heart1
heart4
ribbon3
star3
stardoodle
paper7


You must have a working knowledge of PSP to complete this tutorial.  This tutorial was written using PSPXI

Open a new 600x600 image in PSP.  Flood fill white
Open paper7 and resize to your liking
Open frame2 and resize to your liking.  Delete/Erase any part of paper7 Layer not inside the frame on frame2 Layer.  Add a drop shadow of 3 to frame2 Layer.
Open star3 and resize to your liking.  Add a drop shadow of 3 in pink (rest of drop shadows are in black) to star3 Layer
Open stardoodle and resize to your liking.  Add a drop shadow of 3 to stardoodle Layer
Open heart1 and resize to your liking.  Place behind paper7 Layer.  Add a drop shadow of 1 to heart1 Layer.
Open heart4 and resize to your liking.  Place in front of stardoodle Layer.  Add a drop shadow of 3 to heart4 Layer
Open ribbon3 and resize to your liking.  Add a drop shadow of 3 to ribbon3
Open your tube and resize if needed.
Resize the signature if needed
Add your text
Add your copyright information before saving.

Taurus's Love

Any resemblance to any other signature or tutorial is merely coincidental and is not intended

I am using the beautiful artwork of Myka Jelina.  You can purchase her artwork and a license to use it HERE at her store
The font I am using is Riesling
I am using weescotslass mask 349.  You can download it from her blog HERE
I am using a PTU kit from Scrapin' Daisy called "Colors of Taurus", which can be purchased HERE at I Got Lucky Skraps

Pieces of the kit used in this tutorial are
Element13
Element73
Element42
Element31
Element25
Paper21
Paper18

You must have a working knowledge of PSP to complete this tutorial.  This tutorial was written using PSPXI

Open a new 600x600 image in PSP.  Flood fill white
Open Paper18 and resize to 600x600.  Apply your mask.  Merge mask layers group together.
Open Paper21 and resize to your liking. 
Open Element42 and resize to your liking.  Erase/Delete any of Paper21 Layer not included inside of the frame of Element42 Layer.  Add a drop shadow of 2 to Element42 Layer.
Open Element73 and resize to your liking.  Add a drop shadow of 3 to Element73 Layer
Open Element31 and resize to your liking.  Go to Image/Mirror.  Image/Flip.  Add a drop shadow of 3 to Element31 Layer.
Open Element13 and resize to your liking.  Add a drop shadow of 4 to Element13 Layer.
Open Element 25 and resize to your liking.  Add a drop shadow of 4 to Element 25 Layer.
Open your tube and resize if needed.  Add a drop shadow of 5 to your tube Layer
Resize the signature if needed
Add your text
Add your copyright information before saving

Monday, April 25, 2011

Inked

Any resemblance to any other tutorial or signature is merely coincidental and is not intended.

I am using the beautiful artwork of Keith Garvy.  This tube was purchased while he was with MPT, you can now purchase his art and a license to use it HERE at PTE
I am using Vix Mask 433, which you can download from her blog HERE
I am using the font "Vtc-Nue TattooScript"
I am using a beautiful PTU kit from Broken Dreamz Scraps called "Inked" which can be purchased HERE at Taggers Dreamz

Pieces of the kit used in this tutorial are
4bds-inked-papers
46bds-inked-elements
67bds-inked-elements
16bds-inked-elements
11bds-inked-elements
10bds-inked elements
40bds-inked-elements

You must have a working knowledge of PSP to complete this tutorial.  This tutorial was written using PSPXI

Open a new 600x600 image in PSP and flood fill white
Add a new Raster Layer and flood fill black.  Apply your Mask to this Layer.  Merge your mask group together.
Open element 16.  Resize to your liking.  Add a drop shadow of 1 to this Layer
Open element 11.  Resize to your liking.  Add a drop shadow of 1 to this Layer
Open element 10.  Resize to your liking.  Add a drop shadow of 2 to this Layer
Open element 40.  Resize to your liking.  Add a drop shadow of 2 to this Layer
Open element 67.  Resize to your liking.  Go to Image/Rotate/Free Rotate 30% right. 
Open element 46.  Resize to fit "inside" element 67.  Place Layer behind element 67 Layer
Open paper 4.  Resize to 300x300 pixels.  Place behind element 46 Layer.  Using your magic wand select the inside of the frame of element 67.  Go to Selections/Modify/Expand 2.  Selections/Invert.  Select paper 4 Layer.  Press Delete.  Selections/Select None
Add a drop shadow of 3 to element 67 Layer.  Merge element 67 Layer, element46 Layer, and paper 4 Layer together.
Open your tube.  Resize if needed.  Go to Effects/Photo Effects/Black and White Film.  Add a drop shadow of 3 to your tube Layer.
Resize the signature if needed
Add your text.
Add your copyright information before saving

Friday, April 22, 2011

Perfect Me

Any resemblance to any other tutorial or signature is merely coincidental and not intended

I am using the artwork of fallnangel (yes me).  You can download this tube from my other blog HERE
The font I am using is Shit Happens
I am using a beautiful PTU kit from Tammy's Scraps called "Perfect" which you can purchase HERE at Lollipops 'N Gumdrops

Pieces from the kit used in this tutorial used are
Element73
Element115
Element110
Element26
Element16
Element10
Element 81

You must have working knowledge of PSP to complete this tutorial.  This tutorial was written using PSPXI

Open a new 600x600 image in psp and flood fill white
Open Element26 and resize to your liking
Open Element73 and reseize to your liking.  Add a drop shadow of 2 to Element73 Layer
Open your tube and resize to your liking.  Add a drop shadow of 3 to your tube Layer
Open Element81 and resize to your liking.  Add a drop shadow of 2 to Element81 Layer
Open Element 10, Element 16, and Element 110.  Resize all to your liking and arrange on your canvas. Add a drop shadow of 2 to all three of the Element Layers just opened.
Open Element115 and resize to your liking.  Place over Element81 and erase a small section of the string to give the appearance of them being attached.  Add a drop shadow of 3 to Element115 Layer
Resize your signature if needed.
Add your text
Add your copyright information before saving.

Thursday, April 21, 2011

Black and White Elegance

Any resemblance to any other tutorial or signature is merely coincidental and is not intended.

I am using the beautiful artwork of PinupToons  (Rion Vernon).  You can purchase his artwork and a license to use it HERE at CDO
I am using Kaligraf Latin font
I am using a wonderful PTU kit from oOohLaLa Scraps called Black & White.  You can purchase this kit HERE at I Got Lucky Skraps

Pieces from the kit used in this tutorial are
flower5
doodle1
bling1
frame1
paper14

You must have working knowledge of PSP to complete this tutorial.  This tutorial was written using PSPXI

Open a new 600x600 psp image and flood fill white
Open paper14 and resize to 600x600
Open frame1 and resize to 600x600.  Delete/Erase any part of the paper not viewed inside the frame
Open your tube.  Duplicate your tube layer. 
Working with Duplicate tube Layer go to Image/Resize/150%.  Place Duplicate tube Layer behind frame1 Layer.  Delete/Erase any part of the tube not viewed inside the frame.  Go to Effects/PhotoEffects/Black and White film.  Layers/Properties/Opacity50
Make background Layer, frame1 Layer, and original tube Layer invisible.  Go to Layers/Merge/Merge Visible.  Make all Layers visible again.
Open bling1.  Resize to your liking.  Duplicate bling1 Layer.  Place both bling1 Layers behind paper14 Layer.  Add a drop shadow of 1 to both bling Layers
Open doodle1. Add a drop shadow of 2 to this Layer  Resize to your liking.  Place behind tube Layer
Open flower5.  Resize to your liking. Add a drop shadow of 3 to this Layer. Place above frame1 Layer.
Add a drop shadow of 3 to frame1 Layer
Add a drop shadow of 4 to your tube Layer.
Resize the signature if needed
Add your text
Remember to add your copyright information before saving

Monday, April 18, 2011

Spring Fae


Any resemblance to any other tutorial or signature is merely coincidental and is not intended.

I am using the beautiful artwork of Caron Vinson.  This tube was purchased while she was with CILM, you can now purchase her artwork HERE at CDO
I am using Vix Mask 234.  You can download the Mask from here blog HERE
The font I am using is Freebooter Script
I am using a PTU kit by Sweet Occasion Designs called "Spring Sensations", which can be purchased HERE at Lollipops 'N Gumdrops

Pieces from the kit that you will need for this tutorial are
2 flowers of your choice
1 butterfly of your choice
paper 12
Ivy Frame
tag1

You must have a working knowledge of PSP to complete this tutorial, this tutorial was written using PSPXI

Open a new 600x600 image in PSP.  Flood fill white
Open Paper12.  Apply your mask.  Layers/Merge/Merge Group to merge your Mask group together
Open Ivy Frame and resize to your liking.  Add a drop shadow of 2 to Ivy Frame.
Open your tube.  Add a drop shadow of 2 to your tube
Open your flowers and place both behind your tube.  Add a drop shadow of 2 to both of your flower Layers.
Open tag1 and resize to your liking.  Add a drop shadow of 2 to tag1 Layer.
Open your butterfly and resize to your liking.  Add a drop shadow of 2 to your butterfly
Add your text to the inside of tag1
Resize the tag if needed and add your copyright information

Thursday, April 14, 2011

Gothic Fury


Any resemblance to any other signature or tutorial is merely coincidental and is not intended

I am using the wickedly awesome artwork of Martin Abel.  This tube was purchased while he was with CILM, you can now purchase his artwork and a license to use it HERE at CDO
I am using the font Make Juice
I am using a PTU scrap kit from Broken Dream Scrapz called "Vampire Lust" which can be purchased HERE at I Got Lucky Skraps

Pieces of the kit used in this tutorial are
papers10
elements46
elements39
elements33
elements18
elements10

You must have a working knowledge of PSP to complete this tutorial.  This tutorial was written using PSPXI

Open a new 600x600 image and flood fill white
Open elements39 and resize to your liking.
Open your tube.  Go to Layers/Duplicate.  Make one of your tube Layers Invisible.  Place your visible tube Layer behind elements39.  Go to Effects/Photo Effects/Black and White Film.  Erase any part of the tube not in the frame opening.  Add a drop shadow of 2 to your visible tube Layer.  Make your invisible tube Layer visible again.  Add a drop shadow of 2 to this Layer
Open papers10.  Place behind Black and White tube Layer.  Click on the inside of elements39 Layer with your magic wand (Selecting the inside of the frame).  Go to Selections/Modify/Expand 4.  Selections/Invert.  Selected papers10 Layer.  Press your delete key.  Go to Selections/Select None.
Select element39 Layer  Add a drop shadow of 2 to the Layer
Merge together Papers10 Layer, Black and White tube Layer, and elements39 Layer 
Open elements46 and place behind merged Layer
Open  elements33 and resize to your liking.  Place in front of elements46 Layer.  Rotate elements33 Layer right 20%.  Add a drop shadow to elements33 Layer
Open elements10 and resize to your liking.  Add a drop shadow of 2 to elements10 Layer.  Rotate elements10 Layer Left 20%
Open elements18 and resize to your liking.  Add a drop shadow of 2 to elements18 Layer.
Add your text
Remember to add your copyright information before saving

Tuesday, April 12, 2011

Alice's Nightmare


Any resemblance to any other signature or tutorial is merely coincidental and is not intended

I am using the awesome artwork of Martin Abel. You can purchase his artwork HERE at CDO
I am using Vix_Mask 450 which you can download from her blog HERE
The font I used is Alice in Wonderland
I am using a PTU kit from WD Designz called "Almost Wonderland", which you can purchase HERE at I Got Lucky Skraps!

Pieces of the kit used in this tutorial are
leaves
cloud
ca4
ca3
ca2
ca1
butterflies
watch1
pp33

You must have a working knowledge of PSP.  This tutorial was written using PSPXI

Open a new 600x600 image and flood fill white
Open pp33 and resize to 600x600.  Apply your Mask.  Merge Mask group together
Open cloud and resize to your liking.
Open leaves and resize to your liking.  Add a drop shadow of 1 to leaves Layer
Open butterflies and resize to your liking.  Add a drop shadow of 1 to butterflies Layer.
Open ca3 and resize to your liking.  Add a drop shadow of 1 to ca3 Layer
Open your tube and resize to your liking.  Position your tube so it is "sitting" on top of ca3.  Add a drop shadow of 3 to tube Layer
Open ca4 and resize to your liking.  Position ca4 so it is "standing" on the opposite end of ca3 Layer than your tube.
Open watch1 and resize to your liking
Open ca2 and resize to your liking.  Using the Layers Pallet select watch1 Layer.  Go to Selections/Select All/Float/Defloat.  Using the Layers Pallet select ca2 Layer.  Use your erase tool and erase part of ca2 Layer that is blocking  watch1.  Go to Selections/Select None.  Add a drop shadow of 2 to ca2 Layer and watch 1 Layer.
Open ca1 and resize to your liking.  Go to Image/Mirror.  Add a drop shadow of 2 to ca1 Layer
Add your text and resize the tag to your liking
Add your copyright information before saving

Monday, April 11, 2011

Surprise Butterfly

Any resemblance to any other tutorial or signature is merely coincidental and is not intended

I am using the beautiful artwork of Rion Vernon (PinUp Toons).  You can purchase his artwork and a license to use it HERE at CDO
The font I used in Cheri
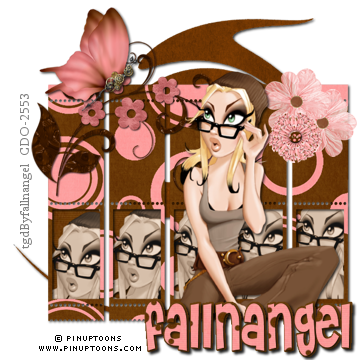
The kit I used is a PTU kit from BabyCakes Scraps called Lottie Dottie, it can be purchased HERE at Lollipops 'N Gumdrops

Pieces from the kit used in this tutorial are
frame_two
swirl_three
Butterfly
floral_doodle
paper_flower
ruffled_flower
paper_twelve
paper_thirteen

You must have a working knowledge of PSP to use this tutorial.  This tutorial was written using PSPXI.

Open a new 600x600 image and flood fill white.
Open frame_two and resize to your liking
Open your tube.  Duplicate your tube Layer 5 times. Make your original tube Layer invisible (you can make a Layer invisible by clicking on the eye of the layer in the layers pallet)  Move frame_two Layer above tube Layers 1-5.  Arrange the tube Layers in the openings of the frame.  Erase any parts of the tubes not in the frame opening.  Merge tube Layers 1-5 together.  Place a drop shadow of 2 on the merged tube layer.  Go to Effects/Photo Effects/Sepia Toning.
Open paper_thirteen.  Place paper_thirteen Layer behind merged tube Layer.  Erase all parts of paper_13 not in the frame openings.
Select frame_two Layer.  Add a drop shadow of 2.  Merge frame_two Layer, merged tube Layer, and paper_thirteen Layer together.
Make your original tube Layer visible.  (click on the eye again to remove the "x" and make the layer visible) Add a drop shadow of 3 to your tube Layer.
Open swirl_three.  Place behind merged frame_two layer.
Open floral_doodle and resize to your liking.  Add a drop shadow of 2 to the layer.
Open Butterfly and resize to your liking.  Add a drop shadow of 2 to the layer.  Place Butterfly Layer in the line of site of your tube
Open paper_flower and resize to your liking.  Duplicate this layer.  Arrange to your liking
Open ruffled_flower and resize to your liking.
For the text
Open paper_twelve in as a new image.
Switch back to your tag. In your materials pallet in the top color square click on the circle on the far right so you are only using the bottom color square. On the bottom color square click on the circle on the far left and go down to pattern, select patter.  Click on the center of the bottom color square to pick a different pattern.  From the available patterns choose paper_twelve.
Write your text
Go to Layers/Convert to Raster Layer
Using your magic wand click on any of the blank space surrounding your text.  Go to Selections/Invert.  Selections/Modify/ Expand 3.  Add a new layer.  Flood fill the inside of the selected area brown on the new Layer.  Go to Selections/Select None.  Move your New Layer to behind your text Layer.  Add a drop shadow of 2 to both Layers.
Resize the tag to your liking.
Add your copyright information before saving

Sunday, April 10, 2011

Happy Birthday


Any resemblance to any other signature or tutorial is merely coincidental and is not intended

I am using the gorjuss artwork of Suzanne Woolcott you can purchase her artwork and a license to use it HERE
I am using Vix Mask 452 which you can download from her blog HERE
I am using the font "Be Safe"
I am using word art that I made and can be downloaded from my digiscrap blog HERE
I am using a PTU scrap kit by Designs By Moo called Birthday Wishes.  You can purchase this kit from I Got Lucky Skraps HERE

Pieces from the kit that I used are
birthdaycake
balloon1
lollipop2
paper08

You must have a working knowledge of PSP to complete this tutorial.  This tutorial was written using PSPXI

Open a new 600x600 image in PSP and flood fill white
Open paper08.  Go to Layers/LoadSave Mask and apply your mask.  Go to Layers/Merge/Merge Group to combine your mask layers into one layer
Open your Word Art
Open birthdaycake and resize to your liking.  Add a drop shadow of 2 to birthdaycake Layer.
Open balloon1 and resize to your liking.  Duplicate balloon1 Layer by going to Layers/Duplicate.  Move one of the balloon layers slightly lower than the other one.  Add a drop shadow of 2 to both balloon Layers.  Open lollipop2 and resize to your liking.  Add a drop shadow of 2 to lollipop2 Layer.  Merge together balloon1 layer, duplicate balloon1 Layer, and lollipop2 Layer.  Duplicate your balloon/lollipop merged Layer.  Go to Image/Mirror.
Open your tube.  Add a drop shadow of 3 to your tube.
Resize the tag to your liking and add your text.
Add your copyright information before saving.

Saturday, April 9, 2011

A Fae in the Butterfly Garden


Any resemblance to any other signature or tutorial is merely coincidental and is not intended

I am using the Beautiful artwork of Dominic Marco.  This tube was purchased while he was with CILM, he now has his own store and his artwork can be purchased HERE
I am using weescotslass template307 which can be downloaded from her blog HERE
The font that I used is Mutlu
The kit that I used is a PTU kit from LadyRaven Creations called "Fallen" which can be purchased HERE at Lollipops 'N Gumdrops

Pieces of the kit used in this tutorial are
Tag1
Butterflyswarm
Doodle1
10_Paper

You must have a working knowledge of PSP to complete this tutorial.  This tutorial was written using PSPXI, but should be compatible for all versions

Open a new 600x600 image and flood fill white
Open 10_Paper, and resize to 600x600  Go to Layers/LoadSave Mask and load your mask.  Go to Layers/Merge/Merge Group to merge your mask into one layer.
Open Doodle1 and resize to 600x600.  Add a drop shadow of 1 to Doodle1 Layer
Open Butterflyswarm and resize to 600x600.  Add a drop shadow of 2 to Butterflyswarm Layer
Open your tube and resize to your liking.  Add  a drop shadow of 3 to your tube
Open Tag1 and place in the lower right corner of your working area.  Add a drop shadow of 1 to Tag1 Layer
Add your text
Resize the tag to your liking.
Add your copyright information before saving

Thursday, April 7, 2011

Black Hearts


Any resemblance to any other signature or tutorial is merely coincidental and is not intended.
I am using the beautiful artwork of Rion Vernon (Pinup Toons).  This tube was purchased while he was with CILM, you can now purchase his artwork HERE at CDO
I am using Wee ScotsLass Mask 4 which you can download from her blog HERE
I am using Kingthings Spike font
I am using a PTU kit from DigiMania Scraps called Misfit Negative which can be purchased HERE at I Got Lucky Skraps

Pieces from the kit I used are
Black Heart
Bow and Glitter Heart
Brad
Butterfly
Feather 1
Glitter Heart Frame
Paper 4
Paper 5

You must have a working knowledge of PSP in order to use this tutorial.  This tutorial was written using PSPXI

Open a new 600x600 image and flood fill white.
Open Paper 5 and resize to 600x600.  Go to Layers/LoadSave Mask and apply your mask.  Layers/Merge/Merge Group to merge your mask group together
Open Paper 4 and resize to 600x600
Open Glitter Heart Frame and resize to your liking.  Using your magic wand tool select the inside of Glitter Heart Frame.  Go to Selections/Modify/Expand 4.  Selections/Invert.  Using the layers pallet select Paper 4 Layer.  Press your delete button.  Selections/Select None.  Add a drop shadow of 2 to Glitter Heart Frame Layer.  Merge Glitter Heart Frame Layer and Paper 4 Layer together.
Open Feather 1 and resize to your liking.  Place behind merged Glitter Heart Frame Layer add a drop shadow of 2 to Feather 1 Layer
Open Brad and resize to your liking.  Place infront of merged Glitter Heart Frame Layer.  Add a drop shadow of 2 on Brad Layer.
Open Butterfly, Bow and Glitter Heart, and Black Heart.  Resize all Layers to your liking and add drop shadows of 2 to all Layers
Open your tube and resize to your liking.  Place a drop shadow of 3 on your tube.
Add your text and a drop shadow of 1 to your text.
Resize the completed tag to your liking
Add your copyright information before saving

Wednesday, April 6, 2011

Rock 'N the Tropics

Any resemblance to any other tutorial or signature is merely coincidental and is not intended

I am using the beautiful artwork of Jamie Kidd.  You can  purchase his artwork and a license to use it HERE at CDO
I am using Vix Mask 387.  You can down load the mask from her blog HERE
The font I used is Indonesiana Serif
The kit I am using is a PTU kit from Rebellious Scraps called Rock It.  You can purchase this kit HERE at Lollipops 'N Gumdrops

Pieces from the kit used in this tutorial are
tribal hearts
pick 3
music notes
guitar 3
frame 2
paper 1
paper 4

You must have a working knowledge of PSP to complete this tutorial.  This tutorial was written using PSPXI

Open a new 600x600 image and flood fill white.
Open paper 4 and resize to 600x600.  Go to Layers/LoadSave Mask and apply your Mask.  Go to Layers/Merge/Merge Group to merge the mask layers together.
Open Paper 1 and resize to 600x600.
Open frame 2 and resize to your liking.  Using your magic wand select the inside of the 3 frames.  Go to Selections/Modify/Expand 4.  Selections Invert.  Using the layers pallet select Paper 1 Layer.  Press your delete key to delete the extra paper around the frame. Selections/Select None.  Add a drop shadow of 2 to Frame 2 Layer.  Merge Frame 2 Layer and Paper 1 Layer together
Open Music Notes and resize to your liking.  Place Music Notes Layer over merged Frame 2 Layer.  Using your erase tool, erase the part of the element that covers the middle panel of Frame 2 Layer.  Add a drop shadow of 1 to Music Notes Layer
Open guitar 3 and pick 3 resizing to your liking.  On guitar 3 layer go to Image/Mirror.  Add a drop shadow of 2 to both the guitar 3 and pick 3 Layers.
Open tribal hearts and add your text on top of the element.  Merge your text Layer and tribal hearts Layer.  Go to Image/Rotate/Free Rotate 25 percent left.
Open you tube.  Place a drop shadow of 3 on your tube.
Resize the signature to your liking
Remember to add your copyright information before saving

Monday, April 4, 2011

Misfit in the Farmily

Any resemblance to any other signature or tutorial is merely coincidental and is not intended

I am using the beautiful artwork of Suzanne Wollcott.  You can purchase her artwork and a license to use it HERE
I used VixMask 245 which you can download from her blog HERE
The font I used is Arabella
The kit I used is a PTU kit from DigiMania called Misfit Negative and can be purchased HERE at I Got Lucky Scraps

Pieces from the kit used in this Tutorial are
Skul
Misfit Word
Frame 1
Glitter Splat
Paper 6
Paper 10

You must have a working knowledge of PSP to use this tutorial.  This tutorial is written using PSPXI

Open a new 600x600 image and flood fill white
Open Paper 10 and resize to 600x600.  Go to Layers/LoadSave Mask and apply your mask.  Merge the Mask group into one layer by going to Layers/Merge/Merge Group
Open Frame 1 and place on the left side of your image. 
Open Paper 6 and resize to 600x600.  Place Paper 6 Layer behind Frame 1 Layer.  Using your magic wand select the inside of each of the frames in Frame 1 Layer.  (By selecting ADD mode on your Magic wand settings you can choose more than one area at a time.)  Go to Selections/Invert.  Using the Layers Pallet Select Paper 6 Layer.  Press the delete key.  Go to Selections/Select None.
Open 3 different tubes by the same artist.  Place 2 similar tubes behind Frame 1 Layer, the third tube in front of  Frame 1 Layer.  Erase/Delete any part of the two tubes behind Frame 1 Layer. The top tube rotate 5 degrees right, the bottom tube 5 degrees left.  (To rotate an image go to Image/Rotate/Free Rotate)  Add a drop shadow of 2 to the Frame 1 Layer and both tube layers behind it.  Merge Frame 1, both tube layers, and Paper 6 Layer together. 
Open Glitter Splat and place behind your merged picture frame Layer
Open Misfit Word and place in front of Glitter Splat Layer.  Go to Image/Rotate/Free Rotate/Rotate Left 25 degrees. Add a drop Shadow of 1 to Misfit Word Layer.
Open Skul.  Place behind your third tube Layer.  Add a Drop Shadow of 2.
Add a drop shadow of 3 to your third tube layer.
Add your text and rotate 25 degrees left
Resize your signature to your liking
Add your copyright information before saving